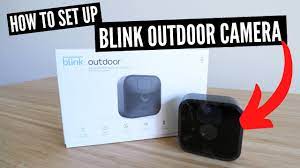
Hey there, Are you looking for a step-by-step guide on how to mount Blink Outdoor camera? Have you recently invested in a Blink outdoor security camera system and now find yourself scratching your head trying to figure out how to get those cameras mounted and set up? Don’t worry, we’ve got you covered. Mounting your new niche Blink cameras is pretty straightforward if you have the right tools and know-how.
In this article, we’ll walk you through the entire process step by step so you can have your cameras up and running and monitoring your home in no time. By the time you finish reading, you’ll be a pro at positioning your cameras for the best coverage, drilling pilot holes, installing mounting brackets, and connecting all the wiring. Your new Blink system will be locked and loaded before you know it. So grab your drill, grab your wrench, and let’s get to work on how to mount Blink outdoor camera.
Preparing for How to Mount Blink Outdoor Camera
The keys to successfully mounting your Blink outdoor camera are preparation and patience.
First, while working on how to mount Blink outdoor camera, make sure you have all the necessary components: the camera, mounting bracket, screws, wall anchors (if mounting to the wall), and a level. You’ll also want your phone with the Blink app ready to go.
Next, determine the best location. Look for a spot 7-10 feet high with a wide field of view and minimal obstructions. Check that you have a strong Wi-Fi signal, and consider how the cable will run to a power outlet.
Once you’ve found the perfect location, drill pilot holes and insert wall anchors if needed. Attach the mounting bracket and level it before the concrete sets.
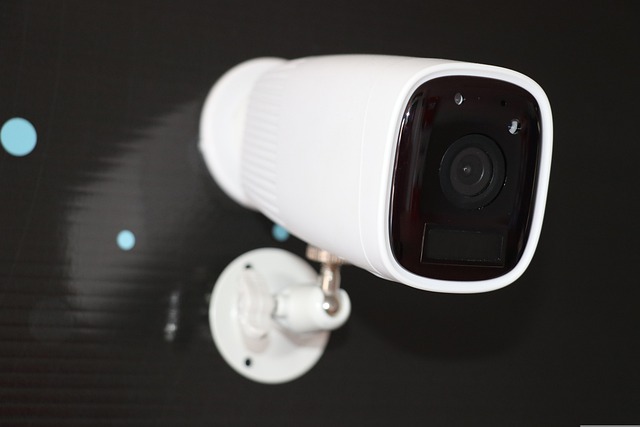
With the bracket in place, you’re ready to attach your Blin camera. Power it on, open the Blink app on your phone, and follow the prompts to connect your camera to your Wi-Fi network and account. Aim the camera and tighten the ball joint to lock it in position.
Congrats, your Blink Outdoor camera is mounted and you’re ready to go about how to mount Blink outdoor camera!
Double-check that it’s level and angled correctly, then test its motion detection to ensure it’s working properly. You can now rest easy knowing your Blink camera will alert you to any activity around your home.
Selecting the Right Mounting Location
In the adventure of how to mount Blink outdoor camera, the next step is picking the right spot to mount your Blink outdoor camera, which is key to getting the best coverage performance.
Find a location with a clear view
You’ll want to choose a location that gives the camera a wide, unobstructed view of the area you want to monitor. Think about up-high spots, like under the eaves of your roof or on the side of your garage. These higher vantage points mean the camera has a better chance of capturing the entire area.
Avoid spots where the view might be blocked by trees, vehicles, or outdoor decor. The camera needs a clear line of sight to detect motion and capture details effectively.
Consider the lighting
While Blink cameras work in both day and night conditions, more light is always better. Place the camera in a spot that will receive plenty of bright light during the day and ambient lighting at night, like from a porch light. If needed, you can add a separate security light to help illuminate the camera’s field of view after dark.
Mount it securely
Choose a mounting surface that is sturdy enough to support the camera, like wood, brick, or stucco. Mounting to Viny! or aluminum siding can be tricky. You may need special hardware or anchors for these surfaces.
Follow the instructions to properly mount your Blink camera. Aim for a height of at least 7 to 15 feet for the best view. Make sure it’s level for the smoothest video playback. And test that the camera has a strong Wi-Fi signal in that location before you start drilling holes!
In the adventure of how to mount Blink outdoor camera, with the right placement and mounting, your Blink outdoor camera will be set up for success in keeping watch over your home.
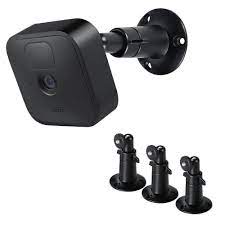
What You’ll Need to Mount the Camera
To mount your Blink Outdoor camera, you’ll need a few essential supplies. Gather the following:
Camera, Base Plate and Cable
- Obviously, you’ll need the Blink Outdoor camera itself, along with the base plate and cable that came in the box. The base plate is what attaches to the wall or ceiling and the cable provides power to the camera
Screws and Anchors
- For most installations, the included screws and wall anchors will work great to securely mount the base plate. However, if you’re attaching it to brick, concrete, or stucco, you’ll want to get the proper anchors for that material.
- You’ll also want to use weather-resistant screws since the camera will be outside. Stainless steel screws are ideal.
Drill/Driver to start how to mount blink outdoor camera
- To install the screws and anchors, you’ll need an electric drill or driver. A cordless drill works well for outdoor installations.
Measuring Tape
- Use a tape measure to determine the ideal height and placement for your camera before installing. You’ll want to mount it high enough to get a good view of the area, but not too high that it’s difficult to access for any maintenance needed
Optional: Surge Protector
- Although not required, using an outdoor surge protector is a good idea to help protect your Blink camera from power surges that could damage the unit.
With the right tools and hardware in hand, you’ll be ready to pick the perfect spot and securely install your new Blink Outdoor camera. Place the camera at a height of at least 7 to 15 feet for an optimal view of your property. Follow the instructions to connect the cable and base plate, ensure everything is level and you’ll be up and running in no time.
Step-by-Step Instruction for How to Mount Blink Outdoor Camera
Mounting your Blink outdoor camera is pretty straightforward, but there are a few things you’ll want to keep in mind. The camera comes with the necessary mounting bracket and hardware to attach it to walls, ceilings, and poles. You have some options for where you place it, so choose a spot that will give you the best view of the area you want to monitor.
Choosing a Location
Think about where the camera will have an unobstructed view of your yard or entryways. Avoid spots where the view may be blocked by trees, buildings, or other objects. Higher areas, like under the eaves of your roof or the top of a pole are good options. Make sure the area you choose is secure, so the camera won’t be disturbed or tampered with.
Attaching the Mounting Bracket
The camera attaches to the mounting bracket, so you’ll secure the bracket in your chosen spot first. Hold the bracket up to check the view, and make sure it’s level before attaching it. Use the included screws to mount the bracket to wood, brick, or siding. For poles, wrap the attached straps around the pole and tighten them.
How to mount blink outdoor camera and get connecting
With the bracket in place, you can now attach your Blink camera. Line up the camera with the bracket and twist it on in a clockwise motion until it clicks into place. Connect the cable from the camera to your Blink sync module so it can start transmitting video.
Adjusting the View
Once the camera is mounted and connected, check the view in the Blink app on your phone to make sure you have the coverage you want. You may need to slightly loosen the bracket to make some adjustments to the angle and positioning. Tighten all parts once you have the perfect view.
Your Blink outdoor camera is now set up and ready to go. Monitoring your home has never been easier until you learn how to mount blink outdoor camera! Let us know if you have any other questions about using your camera system. We’re here to help.
FAQ – Troubleshooting Common Mounting Issues
How to mount blink outdoor camera should be pretty straightforward, but sometimes issues come up. Here is some of the common mounting troubles people run into and how to solve them.
The camera won’t stick to the surface
If your camera isn’t sticking with the included adhesive mounts, the surface probably isn’t compatible or is too uneven. Try these fixes:
- Clean and smooth the surface. Wipe away any dirt or debris, and sand down any uneven spots. The surface needs to be flat for the adhesive to grip properly.
- Try a different surface. The adhesive works best on smooth,non-porous surfaces like vinyl, aluminum, glass, and painted or stained wood. Rough or porous surfaces like brick, stone, and unpainted wood won’t work.
- Use a mount alternative. If the surface won’t work with adhesive, you’ll need to mount the camera another way. Options include wall anchors, clamps, stakes, and tripods. You may need to purchase third-party mounts.
The camera keeps falling off
If your camera isn’t staying put on the mounts, the issue is likely with the installation or equipment. Here are some things to check:
- Ensure the mounts are secure. Press the mounts firmly in place for 30 seconds, as directed. If they still fall, try an alternative, like wall anchors.
- Check the camera clips. Make sure the camera clips are securely fastened to the mounts. If they’re damaged or broken, you’ll need replacement clips.
- Consider a mount with a locking mechanism. Some third-party mounts come with locks to prevent the camera from falling off or being removed easily. These are a good option if other fixes don’t work
Still, having issues?
If you’ve tried the solutions suggested here and are still having trouble mounting your Blink camera, contact Blink Customer Support for further help. They may need to replace damaged or malfunctioning parts to get your camera working as expected.
Conclusion
So there you have it: how to mount Blink Outdoor camera, a step-by-step guide to mounting your Blink outdoor security camera. While it may seem like an intimidating task, taking it slow and following the instructions carefully will have your camera up and running in no time. Once mounted, you’ll have the peace of mind that comes with 24/7 security monitoring and motion-activated alerts to keep an eye on things when you can’t. The hardest part of how to mount Blink outdoor camera is choosing where to place your cameras for the best coverage – the rest is a piece of cake if you go step by step.
Before you know it, you’ll be a pro at installing Blink cameras. Now go forth and mount; your home security is in your hands! Feel free to check back for more tips and tricks to get the most out of your Blink system
How to remove Blink outdoor camera from mount?
You already know how to mount Blink Outdoor camera. Now, to remove a Blink Outdoor camera from its mount, you can follow these general steps:
- Locate the camera: Identify the exact location of your Blink Outdoor camera on the mount.
- Disconnect the camera: Look for the small tab or latch on the camera’s back, near the bottom. Press or slide this tab to release the camera from the mount.
- Remove the camera: Once the tab is released, gently pull the camera away from the mount.
- Unplug any cables: If your Blink Outdoor camera is connected to any cables, unplug them from the camera before completely removing them from the mount.
How to attach blink outdoor camera to mount?
How to mount Blink Outdoor camera or attach blink outdoor camera to mount are the same process, just you can follow these general steps:
- Choose a location: Ensure it has a clear view of the area you want to monitor.
- Position the mount: Attach the mount to the desired surface using screws or adhesive tape.
- Align the camera: Align the back of the Blink Outdoor camera with the mount’s connection point.
- Attach the camera: Slide or snap the camera onto the mount until it locks into place.
- Adjust the camera angle: Once attached, adjust the camera’s angle to capture the desired view. Most mounts allow for tilting and rotating adjustments.
- Test the camera: Confirm that the camera is properly attached and functioning by checking its connection to the sync module and verifying the live feed on the Blink app or device.
How to connect blink outdoor camera to mount?
The specific process may vary depending on the model of the Blink Outdoor Camera or the type of mount you have, either how to mount Blink outdoor camera or connect blink camera to mount. It’s always recommended to refer to the manufacturer’s instructions or user manual for detailed guidance on connecting your specific camera model to its mount.
To connect a Blink Outdoor camera to its mount, you can follow these general steps:
- Ensure you have the necessary components
- Position the mount: The mount should be securely attached to a wall, ceiling, or another surface.
- Align the camera: On the back of the Blink Outdoor camera, you’ll find a screw socket or attachment point. Align this with the corresponding connection point on the mount.
- Secure the camera to the mount: Once aligned, gently press or slide the camera onto the mount until it locks into place.
- Adjust the camera angle: With the camera attached to the mount, adjust its angle to capture the desired view.
- Tighten any screws: If your mount includes screws or fasteners, use them to secure the camera in place.
Remember to refer to the specific instructions provided by Blink for your camera model to ensure proper installation and functionality.
How to Mount Blink Outdoor Camera: We’ll Show You How
See Also:
- Best XT2 & Outdoor Blink Camera Settings
- Best Blink Security System: Blink XT 5 Camera System
- Top Blink Wireless Security Cameras: Blink xt2 vs Outdoor
- Best Blink Camera Outdoor by Blink for Home
- How to Use Blink Home Monitor App for PC & Window
- Amazon Blink Camera Review | Outdoor, Indoor & Mini
- Best Batteries For Blink Camera