blogHome SecurityTech

How to Set Up the Integrated Camera in the myQ App
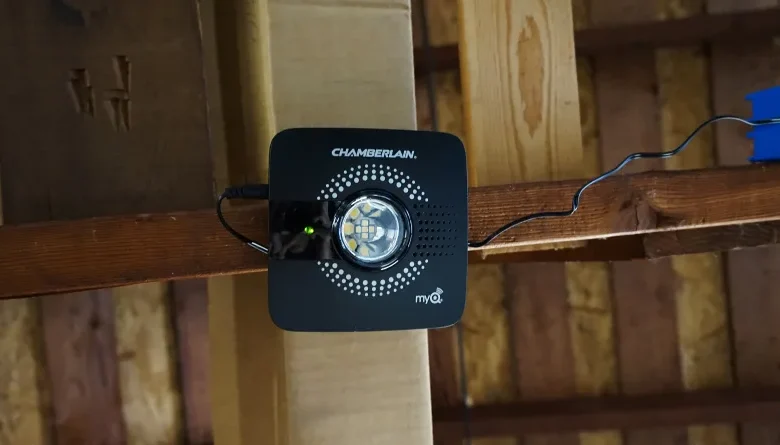
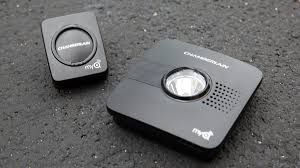
myQ camera setup: The Chamberlain myQ is a powerful smart camera designed for both indoor and garage spaces, providing users with the ability to monitor their entire home day and night through the myQ app. With this smart home technology, users have complete control over their homes even when they are away. They can conveniently check the status of their gate or garage door on their smartphone, eliminating the need for second-guessing. The myQ system empowers users to take control of their homes like never before.

How to Set Up the Integrated Camera in the myQ App

If your Wi-Fi garage door opener has not been added to your home’s Wi-Fi network, please refer to the instructions provided in the myQ App’s “How to Set Up a Garage Door Opener with Integrated Camera” section.

myq garage camera

myQ camera setup

Before connecting the Integrated Camera to your home network, you will need the following:

  1. A smartphone or tablet
  2. 2.4GHz home Wi-Fi network
  3. A strong Wi-Fi signal in the garage or mounting location
  4. Your Wi-Fi network name and password
  5. Bluetooth enabled on your smartphone or tablet

To begin the setup process, ensure that the LED light on the Integrated Camera is blinking in a blue color. If the LED is not blinking blue or if it’s flashing in blue/green, simply unplug the power supply and then reconnect it.

Connect using an Apple or Android mobile device

Here are the steps to set up your Secure View Camera in the myQ app:

  • Log into your myQ account.
  • Tap the “+” icon located in the lower right corner.
  • Select “Device.”
  • Tap on “Video Solution.”
  • Choose the “Secure View Camera” option.
    • If the “Secure View Camera” option is not available, please refer to additional instructions.
  • On the Camera Setup screen, tap “Ready.”
  • Review the information on the “What You Need” screen and tap “Next.”
    • If Bluetooth is disabled, a prompt will appear asking you to enable it.
  • Proceed to the “Open Camera” screen and tap on your Camera from the “Discovered” devices list.
  • Select your home’s Wi-Fi network name from the provided list.
  • Enter your network password and tap “Next.”
  • Give your camera a name and tap “Finish.”

myQ camera setup error

If you’re experiencing difficulty with the myQ Internet Gateway connecting to the server, the problem may be related to issues with your router, modem, or internet connection. The status of the internet connection can be determined by checking the green LED light on the Internet Gateway.  If the gateway is not connected to the router, the green LED light will be inactive.

myQ Camera not Connecting: How to Reconnect to myQ after Changing your Router or Settings

You need to learn myQ camera setup and how to reconnect your Wi-Fi myQ product after replacing your router, updating network settings, or changing your Wi-Fi password, follow these steps:

Change Wi-Fi Settings

If you have replaced your router, updated network settings, or changed your home network password, you will need to reconnect your Wi-Fi myQ product(s) to the updated network. The following steps will guide you through the process of changing the Wi-Fi settings for your myQ camera setup device.

  • Wi-Fi garage door opener
  • Smart Garage Control, myQ Smart Garage Hub, or myQ Garage
  • Integrated Camera or Smart Garage Camera
  • Video Keypad

How to Set up myQ Smart Garage Hub, Update the Wi-Fi Settings on a Smart Garage Control,  or myQ Garage Camera

Here are the steps to change the Wi-Fi settings for your myQ device using the myQ camera setup app:

  1. Open the myQ app on your mobile device or tablet.
  2. Tap on your initials, located in the top left corner.
  3. Select “Device Management.”
  4. Choose the hub you want to update under “HUBS.”
  5. Tap “Change Wi-Fi Settings.”
  6. Based on the LED color on the front of the Smart Garage Hub, follow the corresponding actions:
    • Blinking blue: The setup will start automatically.
    • Solid blue: Unplug the hub and plug it back in.
    • Blinking green or blinking blue and green: Clear Wi-Fi settings (see instructions below).
  7. If you are an Apple user, tap “Join” to connect to the network named “myQ-NNN.” Android users can proceed to step 8.
  8. Select your home Wi-Fi network from the provided list.
  9. Enter your network password and tap “Next.” Your hub will begin connecting to the internet.
  10. On the success screen, tap “Finish.”
  11. Return to the Devices screen.
How to Clear Wi-Fi Settings on Your Smart Garage Control, Smart Garage Hub, myQ Garage or myQ Home Bridge, etc.

myQ Camera Setup

myQ camera setup

  • Find the Settings button on the Hub
  • Press and hold it until the LED light on the hub starts blinking in a blue color.

How to update the Wi-Fi settings on a Video Keypad | myQ smart garage video keypad with camera

Here are the steps to change the Wi-Fi settings for your Video Keypad using the myQ camera setup app:

  1. Open the myQ app on your mobile device or tablet.
  2. Tap on your initials, located in the top left corner.
  3. Select “Device Management.”
  4. Choose the Video Keypad you want to update under “HUBS.”
  5. Tap “Change Wi-Fi Settings.”
  6. On the back of your device, press and hold the gray button for 6 to 8 seconds. The LED on the Video Keypad will start blinking blue. Tap “Next.”
  7. If Bluetooth is not enabled, a prompt will appear asking you to enable it.
  8. Tap “Pair” on the Bluetooth pairing request.
  9. Select your home Wi-Fi network from the provided list.
  10. Enter your network password and tap “Next.” Your Video Keypad will begin connecting to the internet.
  11. On the success screen, tap “Finish.”
  12. Return to the Devices screen.

myQ Garage Camera Offline

Liftmaster myQ camera Setup

myQ camera setup

Here are some troubleshooting steps for two common issues related to the myQ camera setup Hub:

No power to the myQ Hub (myQ Garage, Smart Garage Hub, Smart Garage Control):

  • Ensure that your device is connected to a functioning power outlet.

myQ Hub not connected to the router:

  • Unplug your router or modem from the power outlet.
  • Wait for 10-15 seconds.
  • Plug the router or modem back in.

Read More:

Related Articles

Leave a Reply

Your email address will not be published. Required fields are marked *

Back to top button