Unlocking the Power of Salesforce REST API: A Comprehensive Guide
In this blog, you will understand the complete workings of Salesforce with some Salesforce Rest API examples. The Salesforce REST API is a RESTful API that follows a set of architectural constraints, providing a flexible and efficient way to interact with Salesforce data and services. Unlike the traditional approach of using the Salesforce tool directly, the REST API allows applications to access Salesforce resources without the need for extensive processing capabilities. This RESTful API offers a scalable and standards-based approach to integrating Salesforce functionality into custom applications, enabling developers to leverage the platform’s capabilities in a more streamlined and versatile manner.
Introduction: Salesforce Rest API example
Salesforce is a cloud-based Customer Relationship Management (CRM) platform that simplifies the management of sales and customer-related data for businesses. The Salesforce CRM can be easily set up and operated without the need for extensive technical expertise, making it accessible for users from various backgrounds to effectively manage their customer-centric operations.
Rest API example
A brief overview of the Salesforce REST API:
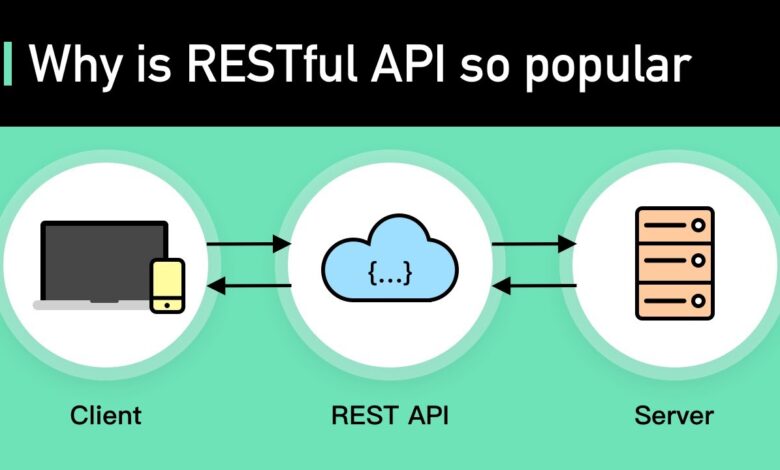
The Salesforce REST API provides a powerful and flexible way to interact with Salesforce data and functionality programmatically. It allows developers to access and manipulate Salesforce records, create new data, update existing records, and perform various other operations.
The REST API follows the standard HTTP protocol, making it easy to integrate with a wide range of applications and platforms.
The importance of understanding REST API usage:
- Integrating with the Salesforce REST API enables developers to build custom applications and solutions that extend the functionality of Salesforce.
- Understanding the REST API and how to effectively use it is crucial for building robust, efficient, and scalable Salesforce-powered applications.
- Mastering the REST API can help developers streamline data-driven workflows, automate business processes, and enhance the overall Salesforce user experience.
II. Prerequisites: Rest API Example
A. Salesforce developer account:
To interact with the Salesforce REST API, you’ll need a Salesforce developer account. This account provides access to the Salesforce Developer Console, which is essential for exploring the API and testing your integrations. If you don’t have a developer account, you can sign up for one on the Salesforce Developer website.
B. Familiarity with REST API concepts:
- Understanding the fundamental principles of REST (Representational State Transfer) APIs is essential for working with the Salesforce REST API.
- Concepts such as HTTP methods (e.g., GET, POST, PUT, DELETE), request/response structure, and API authentication/authorization should be familiar.
- Familiarity with working with RESTful APIs in a programming language of your choice (e.g., JavaScript, Python, or Java) is also beneficial.
C. Understanding of the Salesforce data model:
- The Salesforce data model consists of various standard and custom objects, each with its own set of fields and relationships.
- Knowing how to navigate the Salesforce data model, identify the appropriate objects and fields for your use case, and understand the relationships between them is crucial for effectively interacting with the REST API.
- Familiarize yourself with the Salesforce object documentation and the Salesforce data model in general.
By fulfilling these prerequisites, you’ll be well-equipped to explore and utilize the Salesforce REST API to build powerful integrations and custom applications.
III. Preparing the Request: Rest API example
A. Determining the appropriate Salesforce object:
- Identify the Salesforce object that you want to create or update using the REST API.
- Refer to the Salesforce object documentation to understand the available objects and their fields.
- Select the object that best fits your use case and aligns with the data you want to work with.
B. Identifying the required fields for the object:
- Determine the required and optional fields for the selected Salesforce object.
- Required fields are fields that must be provided when creating a new record.
- Optional fields are fields that can be included to provide additional information.
- Ensure that you have all the necessary information to populate the required fields.
C. Constructing the JSON payload for the POST request:
- Prepare the request payload in the form of a JSON object.
- The JSON payload should include the field-value pairs for the Salesforce object you want to create.
- Follow the Salesforce data model and ensure that the field names and data types match the expected format.
- Example JSON payload for creating a new Account object:
{

"Name": "Example Account",

"Type": "Customer",

"Industry": "Technology",

"Website": "www.example.com"

}
- Make sure to include any required fields and any optional fields that you want to populate.
By carefully identifying the appropriate Salesforce object, understanding the required fields, and constructing the correct JSON payload, you’ll be ready to execute the POST request and create a new record in Salesforce.
IV. Executing the POST Request: Rest API example
A. Obtaining an access token:
- Using OAuth 2.0 flow:
- The Salesforce REST API uses the OAuth 2.0 authorization framework for authentication and authorization.
- To make API requests, you need to obtain an access token that grants the necessary permissions.
- The typical flow involves the following steps:
- Register your application with Salesforce and obtain the necessary credentials (client ID and client secret).
- Initiate the OAuth 2.0 flow and redirect the user to the Salesforce login page.
- Once the user authenticates, Salesforce will provide an authorization code.
- Exchange the authorization code for an access token and a refresh token.
- Retrieving the access token:
- The access token is required to be included in the authorization header of each API request.
- Securely store the access token and refresh the token for future use.
- When the access token expires, you can use the refresh token to obtain a new access token without requiring the user to re-authenticate.
B. Constructing the HTTP POST request:
- Endpoint URL:
- The Salesforce REST API endpoint for creating a new record is:
https://<instance_url>/services/data/v<version>/sobjects/<object_name>/ - Replace
<instance_url>with the appropriate Salesforce instance URL (e.g.,https://na1.salesforce.com). - Replace
<version>with the desired version of the Salesforce API (e.g.,v55.0). - Replace
<object_name>with the name of the Salesforce object you’re creating (e.g.,Account).
- The Salesforce REST API endpoint for creating a new record is:
- Headers:
- Include the following headers in the POST request:
Content-Type: application/json: Specifies that the request body is in JSON format.Authorization: Bearer <access_token>: Includes the access token obtained in the previous step.
- Include the following headers in the POST request:
- Request body:
- Include the JSON payload constructed in the previous section as the request body.
By properly obtaining an access token and constructing the HTTP POST request with the correct endpoint, headers, and request body, you’ll be able to create a new record in Salesforce using the REST API.
V. Handling the Response: Rest API example
A. Checking the response status code:
- After sending the POST request, you’ll receive a response from the Salesforce REST API.
- Examine the HTTP status code in the response to determine the success or failure of the operation.
- A 2xx status code (e.g., 201 Created) indicates a successful request.
- A 4xx status code (e.g., 400 Bad Request, 404 Not Found) indicates a client-side error.
- A 5xx status code (e.g., 500 Internal Server Error) indicates a server-side error.
B. Parsing the response JSON data:
- If the request is successful, the response will include a JSON object containing the details of the created record.
- Parse the JSON data to extract relevant information, such as the record ID, any system-generated fields, and any other data you need to persist or use in your application.
- Example response JSON:
  "id": "0013000000abcdef",
  "success": true,
  "errors": [],
  "name": "Example Account",
  "accountNumber": "ABC123"
}
C. Error handling and troubleshooting:
- If the request fails, the response will include an error message and potentially additional information to help you identify and resolve the issue.
- Parse the error information from the JSON response and handle the errors appropriately in your application.
- Common error scenarios include:
- Missing or invalid required fields
- Unauthorized access (invalid or expired access token)
- Salesforce data validation errors
- Use the error details to troubleshoot the issue, update the request, and retry the operation.
By thoroughly checking the response status code, parsing the response data, and handling any errors, you can ensure that your Salesforce REST API integration is robust and can effectively handle various scenarios.
VI. Example Code: Rest API example
A. Setting up the development environment:
- Choose a programming language and set up the necessary development tools and libraries.
- For example, if using JavaScript, you could use Node.js and the
axioslibrary for making HTTP requests. - If using Python, you could use the
requestslibrary. - If using Java, you could use the
javax.ws.rs.clientAPI or a library likeOkHttp.
B. Implementing the POST request in a programming language:
JavaScript (Node.js):
const axios = require('axios');

async function createSalesforceRecord() {
  try {
    // Obtain the access token using the OAuth 2.0 flow
    const accessToken = await getAccessToken();

    // Construct the request payload
    const payload = {
      Name: 'Example Account',
      Type: 'Customer',
      Industry: 'Technology',
      Website: 'www.example.com'
    };

    // Make the POST request to the Salesforce REST API
    const response = await axios.post(
      'https://na1.salesforce.com/services/data/v55.0/sobjects/Account/',
      payload,
      {
        headers: {
          'Content-Type': 'application/json',
          'Authorization': `Bearer ${accessToken}`
        }
      }
    );

    // Process the response
    console.log('Record created:', response.data);
  } catch (error) {
    console.error('Error creating record:', error.response.data);
  }
}

// Function to obtain the access token (implementation omitted)
async function getAccessToken() {
  // Implement the OAuth 2.0 flow to obtain the access token
  // and return it
  return 'your_access_token';
}

createSalesforceRecord();
The example above demonstrates how to create a new Account record in Salesforce using the REST API with JavaScript and the axios library.
C. Handling the response and processing the data:
- In the example, the response from the Salesforce REST API is processed to extract the relevant data, such as the created record’s ID and any other fields.
- Error handling is implemented to catch and handle any issues that may occur during the request.
- The processed data can then be used in your application as needed, such as storing the record ID, updating the record, or performing further operations.
This Salesforce Rest API example provides a starting point for integrating the Salesforce REST API into your application using a programming language of your choice. You can adapt the code to fit your specific requirements and use case.
VII. Best Practices: Rest API example
A. Pagination and record limits:
- The Salesforce REST API often has limits on the number of records that can be returned in a single response.
- Use pagination techniques to handle large datasets, such as using the
limitandoffsetparameters in the request URL to retrieve records in batches. - Example:
https://na1.salesforce.com/services/data/v55.0/sobjects/Account/?limit=200&offset=200 - This allows you to retrieve the data in manageable chunks and avoid exceeding the response size limits.
B. Error handling and retries:
- Implement robust error handling mechanisms to gracefully handle various types of errors, such as network issues, authentication failures, and Salesforce data validation errors.
- Consider implementing retry logic to handle transient errors and automatically retry the request a few times before failing.
- Use exponential backoff techniques to avoid overwhelming the API with retries.
- Log and monitor errors to identify and address recurring issues.
C. Caching and optimization techniques:
- Implement caching mechanisms to reduce the number of API calls and improve the performance of your application.
- Cache access tokens, record data, and other frequently accessed information to avoid unnecessary API calls.
- Use conditional requests (e.g.,
If-Modified-Sinceheader) to retrieve only the data that has changed since the last request. - Batch multiple operations into a single API call to reduce the overhead of individual requests.
- Leverage Salesforce’s query optimization features, such as selective field retrieval and SOQL query optimization, to minimize the amount of data returned.
- Monitor API usage and rate limits to ensure your application stays within Salesforce’s usage guidelines.
By following these best practices, you can build a robust and efficient Salesforce REST API integration that provides a great user experience, minimizes API usage, and is resilient to various error scenarios.
Salesforce Rest API Example
Salesforce provides a robust REST API that allows you to interact programmatically with your data. Here are some examples of what you can do using the Salesforce REST API:
- Retrieve Organization Information:
- You can use REST API resources to retrieve organization-level information, such as a list of all objects available in your Salesforce organization.
- Work with Object Metadata:
- Retrieve object metadata information using REST API resources. For modifying or creating object metadata, refer to the Metadata API Developer Guide.
- Create, Retrieve, Update, and Delete Records:
- Use REST API resources to perform CRUD operations on records. You can create, retrieve, update, and delete records, along with other record-related operations.
- Search and Query Records:
- Utilize Salesforce Object Search Language (SOSL) and Salesforce Object Query Language (SOQL) to search and query records.
- Retrieve Images from Rich Text Area Fields:
- Retrieve images from custom rich text area fields using the sObject Rich Text Image Get resource.
- Insert or Update Blob Data (e.g., Images or PDFs):
- Use sObject resources to insert or update binary large objects (blobs) in Salesforce.
- Get Blob Data for a Given Record:
- Retrieve blob data for a specific record using the sObject Blob Get resource.
- Recently Viewed Information:
- Programmatically retrieve and update recently viewed record information using REST API Query and Recently Viewed resources.
- Manage User Passwords:
- Use REST API resources to manage user passwords, including setting or resetting passwords.
- Work with Approval Processes and Process Rules:
- Utilize REST API resources to interact with approval processes and process rules.
Remember that the flexibility and scalability of the Salesforce REST API make it an excellent choice for integrating Salesforce into your applications and performing complex operations at scale.
How do I authenticate with the Salesforce REST API?
To Salesforce REST API authenticate, follow these steps:
- Install or Update Salesforce CLI:
- If you haven’t already, install Salesforce CLI on your system. You can find the latest version of your operating system on the official Salesforce CLI page.
- Log in to Your Developer Org:
- Open your terminal and log in to your Salesforce Developer org using Salesforce CLI:
sf org login web - A browser window will open, prompting you to log in with your user credentials. Click “Allow” to grant access.
- Open your terminal and log in to your Salesforce Developer org using Salesforce CLI:
- Retrieve the Access Token and Instance URL:
- After successful authentication, you’ll see a confirmation message in your terminal.
- Use the following command to view authentication information (replace
<username>with your actual username):sf org display --target-org <username> - Make note of the long Access Token string and the Instance URL. You’ll need both for making cURL requests.
- Use the Access Token for Authentication:
- In your cURL requests, include the access token (also known as a “bearer token”) in the Authorization header:
curl -H "Authorization: Bearer <your_access_token>" <instance_url>/services/data/v59.0/query/?q=SELECT+Id+FROM+Account - Replace
<your_access_token>with the actual token and<instance_url>with your instance URL.
- In your cURL requests, include the access token (also known as a “bearer token”) in the Authorization header:
Remember that Salesforce supports two types of access tokens: opaque tokens and JSON Web Token (JWT)-based access tokens. Choose the appropriate type based on your use case.
Web Services Salesforce Example

Rest API example
Salesforce provides two types of web services: REST and SOAP. Let’s dive into each:
1. Apex REST Web Services:
-
- You can expose your Apex class methods as REST web service operations. By doing so, external applications can integrate with Salesforce to perform various operations.
- For example, imagine your company’s call center uses an internal application to manage on-premises resources. Customer support representatives need to view and update case records in Salesforce through the same application. By using one interface, representatives can access internal resources and manage case records. The application calls an Apex REST web service class to handle Salesforce case records.
- To create an Apex REST class, follow these steps:
- Define your class as
global. - Define methods as
global static. - Add annotations to the class and methods. For instance, the following sample Apex REST class has one method called
getRecord, which is a custom REST API call:@RestResource(urlMapping='/Account/*') global with sharing class MyRestResource { @HttpGet global static Account getRecord() { // Add your code here } } - The base endpoint for Apex REST is
https://yourInstance.my.salesforce.com/services/apexrest/. The URL mapping is appended to this base endpoint to form the endpoint for your REST service. For example, in the class example, the REST endpoint would behttps://yourInstance.my.salesforce.com/services/apexrest/Account/*.
- Define your class as
2. Apex SOAP Web Services:
-
- SOAP (Simple Object Access Protocol) is another way to expose your Apex methods as web services.
- You define these methods using the
webservicekeyword. For instance:global class MyWebService { webservice static Id makeContact(String contactLastName, Account a) { Contact c = new Contact(lastName = contactLastName, AccountId = a.Id); insert c; return c.id; } }SOAP web services use XML-based messages and are more rigid in structure compared to REST.
Remember to replace yourInstance with your actual Salesforce Org instance when working with these services. If you have any specific use case or need further assistance, feel free to ask! 😊
How to Obtain a Salesforce Token API
To authenticate with the Salesforce REST API, you need to obtain an access token using the OAuth 2.0 authorization flow. This token is used to authenticate your API requests and access Salesforce data securely. The token has a limited lifespan, so you must handle token expiration and refresh the token when necessary.
Salesforce Oauth2 Token.
The Salesforce OAuth2 token is a secure access credential used to authenticate API requests. It is obtained through the OAuth2 authorization flow, which allows your application to access Salesforce data on behalf of a user or a connected app. The token has a limited lifespan, requiring a refresh to maintain access.
Salesforce Oauth Endpoint.
The Salesforce OAuth endpoint is the URL used to request access tokens for authenticating API calls. It facilitates the OAuth2 authorization flow, where your application exchanges client credentials for an access token that can be used to make authorized requests to the Salesforce REST API on behalf of a user or a connected application.
Salesforce API Oauth
Salesforce’s OAuth-based API authentication enables secure access to Salesforce data and services. Your application uses the OAuth flow to obtain an access token, which is then included in API requests to authenticate and authorize the interactions. This token-based approach ensures controlled and auditable access to Salesforce resources.
Salesforce Rest Integration

Rest API example
Integrating your applications with the Salesforce platform using the REST API unlocks a wealth of opportunities. The Salesforce REST API enables you to seamlessly interact with Salesforce data, automating business processes and enhancing the functionality of your custom applications. By leveraging this powerful integration, you can streamline data exchange, improve business intelligence, and create unified user experiences that leverage the robust capabilities of the Salesforce ecosystem.
Key aspects of Salesforce REST API integration include:
- Secure Authentication: Utilize the OAuth 2.0 flow to obtain access tokens, ensuring secure and authorized access to Salesforce data.
- Accessing Salesforce Data: Perform CRUD (Create, Read, Update, Delete) operations on Salesforce objects, allowing you to integrate with and manipulate the data within your applications.
- Customized Workflows: Tailor your integration to support specific business requirements, automate processes, and enhance productivity.
- Seamless User Experience: Combine Salesforce data with your application’s functionalities, providing users with a unified and streamlined experience.
- Scalability and Performance: Leverage best practices, such as pagination and caching, to ensure efficient and scalable integration that can handle growing data volumes and user demands.
Salesforce Rest API Post Example
To create a new Salesforce record using the REST API, you first obtain an OAuth access token for authentication. You then construct a JSON payload with the required data and make a POST request to the appropriate Salesforce object endpoint, including the access token in the headers. The response contains details of the newly created record.
Salesforce Rest API Documentation
The Salesforce REST API documentation provides comprehensive guides and reference materials for developers to integrate their applications with the Salesforce platform. It covers authentication, data manipulation, object relationships, and more, enabling developers to leverage the full power of Salesforce’s capabilities in their custom applications and integrations.
PowerShell Rest API Example
To make a REST API call using PowerShell, you can leverage the Invoke-RestMethod cmdlet. This cmdlet sends an HTTP or HTTPS request to a RESTful web service and parses the response. You can specify the HTTP method (GET, POST, PUT, DELETE), headers, and request body to interact with the API. The response is then returned as a PowerShell object.
GraphQL Rest API Example
GraphQL is an alternative to traditional REST APIs, providing a more flexible and efficient way to fetch data. With GraphQL, clients can request the exact data they need in a single request, reducing unnecessary payloads. To interact with a GraphQL API, you construct a query that specifies the desired data, and then make an HTTP POST request with the query. The response contains the requested data in a JSON format.
ServiceNow Rest API Examples
ServiceNow offers a robust REST API that allows the integration of external applications with its platform. To access the API, you first obtain an OAuth access token for authentication. You can then make HTTP requests to the appropriate ServiceNow API endpoints, specifying the desired operation (create, read, update, delete) on ServiceNow records. The API response contains the requested data or confirmation of the performed action.
Splunk Rest API Examples
Splunk provides a comprehensive REST API for interacting with its platform programmatically. You can use the API to search for data, create alerts, manage users, and perform various other administrative tasks. To access the Splunk API, you authenticate with a session key or access token, and then make HTTP requests to the appropriate endpoints. The API responses are typically returned in JSON format, which can be easily parsed and integrated into your applications.
Golang Rest API Example
In Golang, you can use the built-in net/http package to interact with REST APIs. To make a GET request, you create an http.Client and use the http.Get() function, passing the API endpoint URL. For POST or other methods, you construct an http.Request object set the HTTP method and headers, and send it using the http.Client.Do() function. The response is then processed, and the data is extracted.
Read More:
- What is Power BI Rest API Data Source: 5 Best Uses With API
- What is an SDK vs API Example: 5 Best Key Difference
- How to Get ChatGPT API Key: 6 Ways to Make Money with API
- Best Practice for Shopify Webhooks: Rest API | Topics List
- Best Shopify Product API: Create Shopify API
- How to use Janitor AI without API: Simplify Your Workflow
- How to Use Google Bard API Key Free
- Salesforce Rest API Example Python